Holiday Coin Purse Tutorial
Finished size approx. 4.5" x 5"
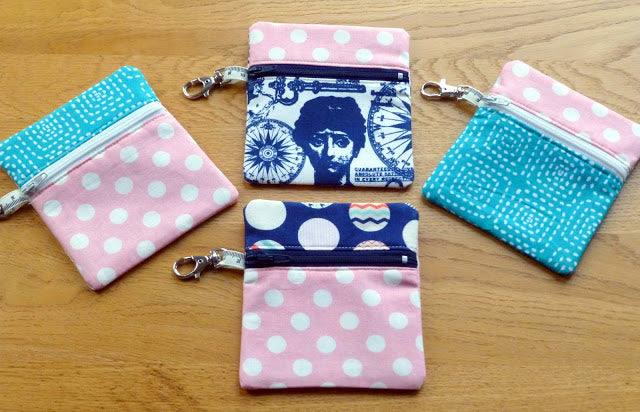
Judith from Just Jude Designs has brought us another great little tutorial showing you how you can make these cute Holiday Coin Purses!
You will need:
From both outer & lining fabrics:
1 x (5" x 2") top
1 x (5" x 4") bottom
1 x (5" x 5.5") back
I used Pink Polka, Trendsetter and Stitch Square Teal
You will also need:
the same measurements cut from medium/heavy sew-in vilene (spray basted to the wrong sides of the outer pieces)
5" nylon zipper (or longer)
2" piece of narrow ribbon (optional)
small key fob (optional)
zipper foot
Method:
Assume 1/4" seams unless advised otherwise
1. To make the front, take the largest front piece and lay it down, right side facing up. Next position the zip (teeth down) along the top edge (if your zip is wider, overhang the bulky zipper pull part, so you don't have to sew around it). Finally, place the corresponding lining piece right side facing down. Pin in place.
- Attach the zipper foot to your machine and sew approx. 1/4" in from the raw edge.
-
Flip the lining fabric back so that wrong sides are together & the zip is exposed. Press flat. Sew an edging seam (less than ¼”) along the top of the seam (where it meets the zipper), through all layers.
-
Now attach the 'top' pieces to the other side of the zip. Firstly lay down the narrow front piece (right side facing up), then the zippered front piece, right side facing down, and finally the corresponding, narrow lining piece, right side facing down. Keep all the edges aligned & pin the top/zip edge.
-
Sew along the zip edge, as before. Again flip the outer and lining pieces back to expose the zip and press flat. Before proceeding, make sure you can easily open and close the zipper. As before, sew an edging seam on the top, close to the zip, to keep the fabric lying flat.
-
Bring the zipper pull into the pouch, switch back to your normal sewing foot, and sew across both ends of the zipper before trimming off any excess. -
Thread a piece of ribbon through the key fob and machine tack in place on top of the zipper, key fob pointing in towards the pouch (if your ribbon has directional print, don't put it in upside down, like I did!). - Now layer all the pieces as follows:
Large lining piece (right side facing up)
Outer front (right side facing up)
Outer back (right side facing down)
Pin and sew along the top edge only.
-
Separate the outer pieces from the lining pieces and sew along the bottom edge of the outer layers.
-
Now align the bottom edges of the lining pieces and sew along this edge, leaving a 2” gap in the middle for turning.
-
Place all the layers back together so they are lying flat. Sew through all layers down both sides, taking care as you sew over the zip ends. You may wish to reverse sew over the zip ends for extra strength, and begin and end your seams with a reverse stitch.
-
Pull the pouch right side out through the gap in the lining. Before pushing the lining into the pouch, close the gap by either hand or machine stitching closed.
- Give the pouch a final press and fill up with holiday spending money!
These little pouches are so easy to make, why not make a few more for your holiday friends!
Happy holiday sewing!
Jude xo