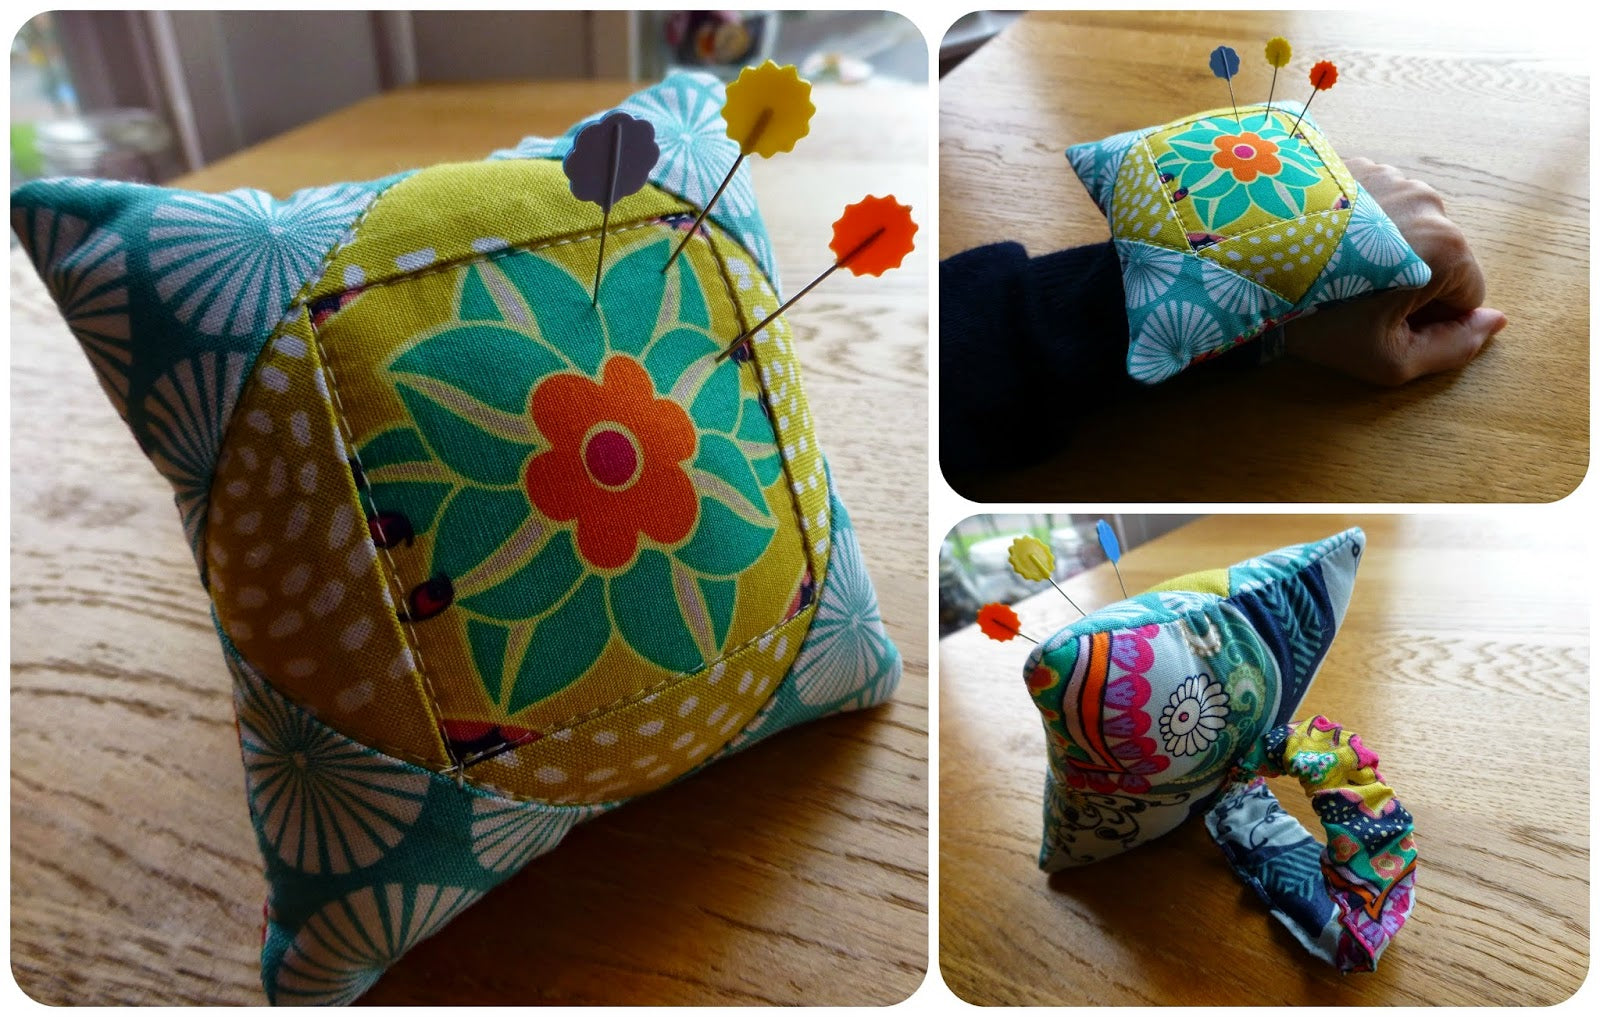
Wristlet Pinny Tutorial!
Judith from Just Jude Designs has shared this lovely wristlet pin-cushion tutorial with us!
Finished size: 4" square
You will need:
One 2.5" x 2.5" centre square
Two 2.5"x 2.5" squares, cut in half diagonally (= 4 setting triangles) Here I've used Stitch Circles Citron
Two 3.25" x 3.25" squares, cut in half diagonally (= 4 outer setting triangles) Here I've used Fancy Pinwheels Teal
One 4.5" x 4.5" square (back of pin chushion) Here I've used Carnaby Street Brit Boutique
One 2.5" x 10" strip
One piece of 0.75" wide elastic (length will be your wrist measurement + 1" overlap)
Two pieces of compressed wadding 4.25" x 4.25" square
Method:
Assume 1/4" seam allowance unless advised otherwise
1. Sew setting triangles to the centre square. Attach opposite sides first & press away from the centre before attaching the remaining 2 sides. (To find the centre of the edge of the triangle fold it in half and pinch. Do the same with the centre square, then line up the pinch marks and pin.)


2. Trim the square to 3.25", making sure you have 1/4" seam allowance at the corners of the centre square.


3. Attach the outer setting triangles in the same way as before, and trim to 4.5", again making sure you have 1/4" seam allowances at the corners.


4. Spray baste a piece of wadding to the wrong sides of the front and back pieces.

5. Quilt the front as desired (I stitched in the ditch!).

6. Measure the elastic around your wrist, allowing a 1" overlap.

7. Make the wristlet: Iron both long sides of the strip under by 1/4". Iron one of the short ends under by 1/4" also. Finally, iron the strip in half lengthways.

8. Place the elastic into this casing, right up to the folded short end, and fold the strip back up again.

9. Sew across the bottom of the enclosed end of the strip a few times, making sure to catch the elastic.

10. Sew along the long open edges, as close to the edge as you can. Before you get to the end of the elastic, put a safety pin in it. This will make it easier to pull the elastic to the end of the strip. Stitch to the end of the strip, but leave the short end open.


11. Slide the safety pin up to the end of the strip and expose the end of the elastic. Remove the pin & align the end of the elastic with the raw edges of the end of the strip. Stitch a few times across the end to secure.


12. Mark the centre of the back piece.

13. Pin & sew the strap to the centre of the back piece, making sure the raw edge end of the strap is hidden underneath.


14. Pin the front and back pieces right sides together. Stitch all the way around, leaving a 2" gap in the centre of one of the sides. Snip the corners at an angle to reduce bulk.


14. Turn the pinny right side out and push the corners well out with scissors or a crochet hook.

15. Stuff the pinny well with toy stuffing before hand sewing the gap closed with a ladder or whip stitch.


16. Stick with pins, slide onto your wrist and get sewing!

Jude xo