We welcome Judith from Just Jude to the Fabric Yard blog. Those of you in the blogging world will not doubt have come across her lovely blog previously. Judith also runs classes in Belfast and for those of you local to the area, they are very much worth checking out!
As you may know, we sell flex frames at Fabric Yard. Until now, we have only sold them in packs of 100 on our website. They are now available to buy in packs of 10, 50, and 100!
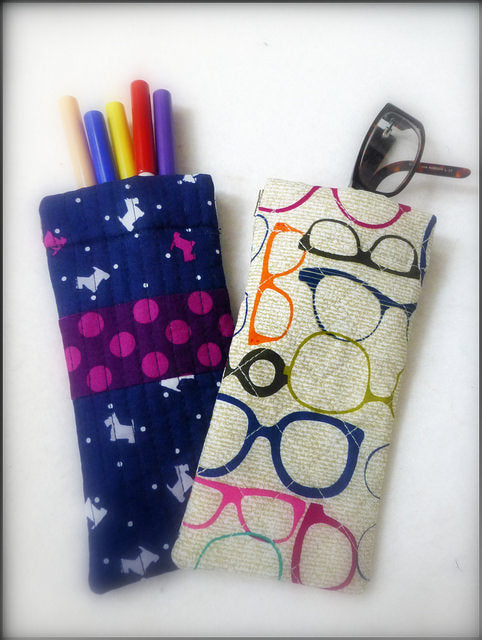
Judith has kindly written out this tutorial for making a glasses case and a
purse to help those of you who are new to the world for flex frames!
Flex Frame Tutorial:(all fabrics & flex frames shown are available from Fabric Yard)

You will need: 3.5" Flex Frame 2 x (4" x 9") from outer fabric, lining fabric & wadding (optional) (If you want to stiffen your pouch further use iron-on Vilene) Jewellery pliers Sewing Kit, sewing machine & adjustable zipper foot Assume 1/4" seam allowances unless advised otherwise
1. Spray baste the wadding to the outer fabric and quilt as desired.
2. Put the 2 outers right sides together and mark 2 5/8" down from the top.
3. Now sew the bottom section, from marker to marker, leaving the top open (this is the flex frame section). Repeat for the 2 lining pieces, leaving a gap for turning in the centre of the bottom edge.
4. Match up the top edge of one of the lining sides with the top edge of one of the outers, right sides together. Align the sides where the stitch lines start, pin to secure and sew around the top section. Repeat for the other side. Carefully snip the corners at an angle to lessen the bulk.
5. Turn the pouch right side out through the gap in the lining. Press flat and turn the raw edges of the gap under. Either hand sew closed with a ladder stitch or top stitch on your machine.
6. Fold down one of the top 'flaps', pin and sew close to the inner edge. An adjustable zipper foot will help you get close to the edge. Start and finish with a reverse stitch. Repeat for the other 'flap'.
7. Take your flex frame and using jewellery pliers, fold in one of the ends before sliding the frame into the pouch.
8. Push back the fabric to expose the open ends of the flex frame. Slot the hinge together, insert the bar, and then close the open end of the hinge using the jewellery pliers in the same way as before.
9. And that's your flex frame completed!

If you fancy having a go at a slightly different style, try this coin purse by drafting a template as shown below and following the same steps above. (Insert 1.5" box corners in both outer and lining sections after step 3)


Have fun! Jude xo