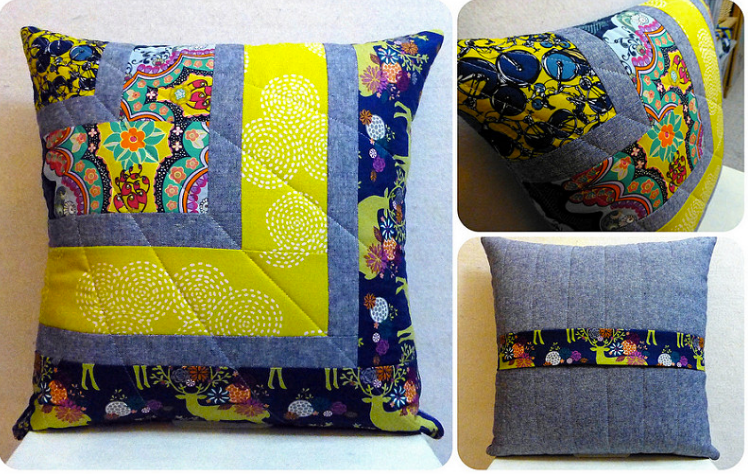
Judith from Just-Jude blog has put together this great Quarter Log Cabin Cushion Tutorial - great for using up your scraps and I think you'll agree, Judith has co-ordinated her scraps to stunning effect!
(approx. 16.5" x 16.5" with envelope back)

You Will Need:
1 x (18" x 18") cushion filler
For the front:
1 x 4.5" square (corner) I used Cleta Cycle of Life Sol
2 x (1.5" x 44") strip of Essex linen (denim) - cut width of fabric. Sub-cut the strips until you have the following:
1 x 4.5"
1 x 5.5"
1 x 8.5"
1 x 9.5"
1 x 12.5"
1 x 13.5"
Strips of 3 contrasting fabrics:
Fabric 1: 1 x (3.5" x 5.5") & 1 x (3.5" x 8.5") I used Carnaby Street Brit Boutique Royal
Fabric 2: 1 x (3.5" x 9.5") & 1 x (3.5" x 12.5") I used Stitch Circle Citron
Fabric 3: 1 x (4.5" x 13.5") & 1 x (4.5" x 17") I used Yes Deer Navy
1 x (18" x 18") square of compressed wadding
1 x (18" x 18") square of calico/sheeting (won't be seen)
For the back:
1 x (22" x 18") Essex Linen
1 x (22" x 18") compressed wadding
1 x (22" x 18") calico/sheeting (won't be seen)
1 x (5.5" x 17") strip of contrasting fabric for envelope outer band
1 x (2" x 17") strip of contrasting fabric for envelope inner edging
Method:
Assume 1/4" seams unless advised otherwise
1. Sew the shortest Essex linen strip to the right hand edge of your corner square. Press this away from the square before adding the next shortest strip to the bottom edge of the square.


2. Now sew on your first contrasting fabric strips in the same way. Press seams away from the corner square.


3. Continue adding alternating rows of narrow Essex linen strips with contrasting fabric strips, ending with the 3rd contrasting fabric.


4. Spray baste the cushion top with wadding and calico/sheeting. Quilt as desired and trim down to 17" square.


5. Spray baste the 3 cushion pieces (linen, wadding, calico/sheeting) and quilt as desired. Cut this panel into 2 pieces measuring (17" x 8") & (17" x 13").

6. Iron the envelope band in half lengthways, wrong sides together.

7. Sew the band onto a long side of the shorter back panel. Flip band over and press.

8. Iron the envelope inner edging in half lengthways, wrong sides together. Open out and press the long edges to the centre crease. Finally fold over in half once more and press.


9. Pin the inner edging over one of the long edges of the larger back panel. You will be sewing this edging down close to the folded edge of the fabric so pin where you will sew, and then check the back to ensure you have caught the edging.


10. Now assemble the cushion. First lay the cushion front right sides up. Then place the envelope back+outer band right sides down (band pointing down). Finally, lay the last envelope piece right sides down with edging pointing up. Align all the outer edges, pin and sew using 3/8" seam allowance.


11. Snip the corners at an angle before turning right sides out. Push the corners well out with scissors or a crochet hook before inserting an 18" cushion filler.


Ta da! Place on a prominent position on the sofa and brace for unending compliments!
Have fun!
Jude xo