As fabric lovers we adore patchwork quilts, we definitely appreciate the time and love in each stitch, each fold and of course the gift of a quilt is literally the most welcome and lovely thing ever! But what we also all know is that quilts take time and patience, and measuring, and remeasuring and to some it can be quite daunting. So today, Judith at Just Jude Designs has created a pattern from... patchwork fabric! This pattern should not only be easier than a traditional patchwork quilt but much faster. Fabulously fast!
Ready, Set, Gift!
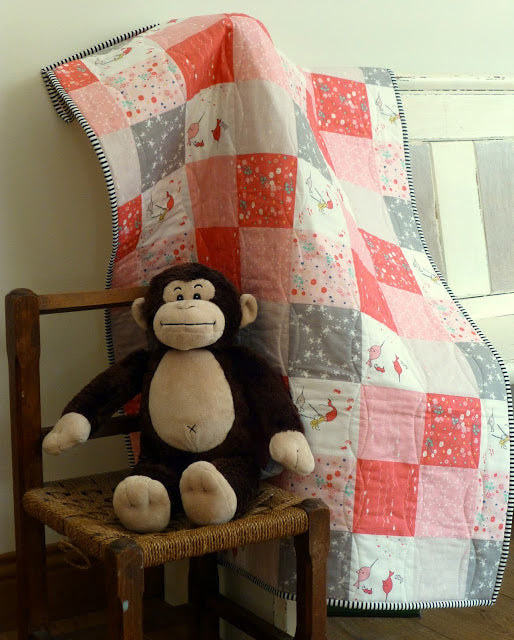
Crib Quilt (28.5" x 42")

You will need:
- 0.75m front fabric panel (in this case a pre-formed patchwork design)
- 0.75m backing fabric
- 0.75m compressed wadding (at least 45" wide)
- 10" x 44" fabric for binding
- Basting spray (505)
For fabric inspiration check out our Kids Fabric collection
Method:
1. Spray baste the front panel and backing to the wadding as per this tutorial.
2. Quilt as desired.

3. Trim the quilt to the required size.

4. Cut the binding fabric into 4 x 2.5" strips. Join these end to end with 1/4" seam allowance. Iron the full length of the binding in half lengthways, wrong sides together.

5. Place the binding onto a long side of the quilt, raw edges to raw edges and leaving approx. 5" unsewn at the start.

6. Using 3/8" seam allowance sew the binding down. When you come to a corner, stop sewing 3/8" short of the end of the quilt.

7. Take the quilt out from the needle and turn 90 degrees.

8. Flip the binding up and away from you, creating a straight line from the raw edges of the binding down to the raw edge of the quilt. This creates a 45 degree mitre fold in the corner.

9. Now bring the binding strip down on top of the mitre fold, aligning again the raw edges with the raw edges of the quilt. Continue sewing from the top edge and repeat this process at each corner.

10. Stop sewing a few inches short of where you started & take out of the machine.

11. The edge of the starting strip needs to be in the middle of the gap, so trim away some excess if needed.

12. Overlay the starting strip with the finishing strip, so you can just see the end of the starting strip. Measure 0.5" overlap & cut away excess from finishing strip.

13. Join the 2 ends with 1/4" seam.

14. Finger press the seam open and refold the binding into position on the quilt.

15. Put back under the machine and sew the gap closed (again using 3/8" seam allowance).

16. Press the binding out and flip over to the back of the quilt. From the front of the quilt, stitch in the ditch to attach the binding to the back. A 'ditch' quilting foot is useful here. Make sure you are catching the binding at the back and mitre fold the corners before stitching down in the ditches.


Machine wash on a cold setting and tumble dry on a low heat.

Happy Sewing!
Jude xo