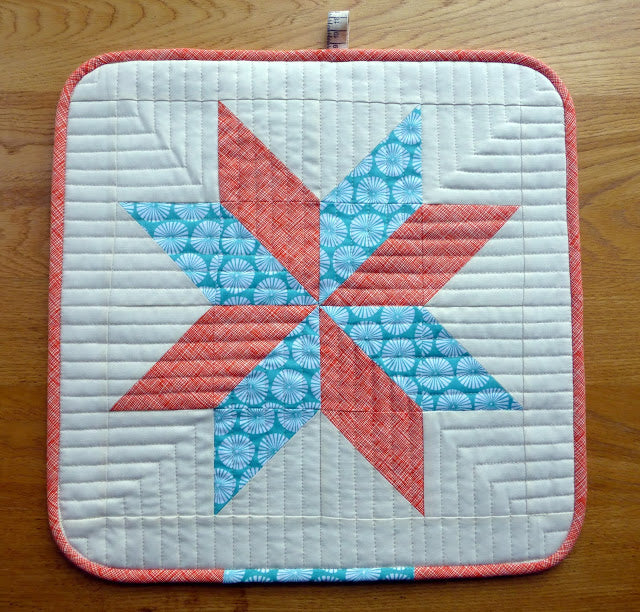
Judith from Just Jude Designs has put together this great little Non-slip Table Mat tutorial for you us. It can take pride of place on your kitchen table!
(approx. 16" x 16")
You will need:
2 fat eighths (star) (Here I used fancy pinwheels teal and crosshatch tangerine)
1 long quarter metre background (one of the kona solids is perfect)
17" x 17" piece of heat resistant wadding
16" x 16" piece of Bulgomme table protector
1 long metre fabric for binding
6" Ribbon loop (optional)
Method: Assume 1/4" seams unless advised otherwise
1. Make a 12.5" unfinished star block using this (Ellison Lane) tutorial:
2. Attach 2.5" borders to the sides of the block, press the seams away from the centre before adding the top and bottom borders.
3. Spray baste the wadding to the wrong side of the star block. Quilt as desired.
4. Trim to 16" square.
5. Draw around a saucer or lid & cut out on the line to curve the corners.
6. Use the trimmed quilted block as a template to draw on the non-rubber side of the Bulgomme table protector.
7. Place the table protector wrong sides together with the quilted front piece. Machine tack close to the edges to fix in place.
8. Make & attach the binding following the tutorial for the Pixilated Heart mini quilt.
9. Carefully snip into the corners at 1cm intervals.
10. Flip the binding over to the wrong side. Machine sew the binding in place from the right side by stitching in the ditch.
11. Attach a ribbon loop by stitching in the ditch from the front.
I hope you enjoy making your non-slip mat!
Jude xo


